Beer Brewing Equipment -- Wort Chiller
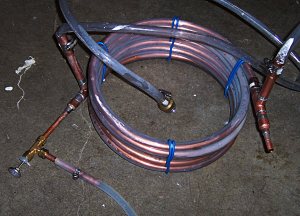
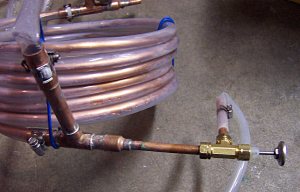
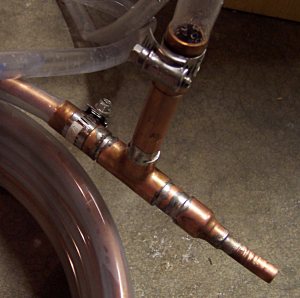
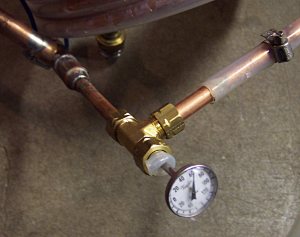
From the upper left moving clockwise, the images below show the whole setup, the wort-out side of the chiller, a closeup of the thermometer in the output side, and a close up of the input side fittings.
I'll try to be as precise as I can remember concerning the tubing and fitting sizes, but be sure to actually try the pieces out in the store to verify they actually do fit in the right places. The sizes of the various bits are not intuitive at all and it's much better to focus on the inner diameter (ID) and outer diameter (OD) of the parts you're buying.
The inner copper tube is 1/4" soft copper tubing (OD 3/8"), sold in 20' lengths. The outer tube is 5/8" vinyl tubing (ID 5/8"). So there's 1/4" difference in diameter between the two. The tees that are soldered on each end are 1/2" tees, with an ID of 5/8" (confused yet?). Next to the tee is a 1/2" - 1/4" reducing couping. The ID's are 5/8" and 3/8" respectively. Short sections of 1/2" copper tubing (5/8" OD) join the tee to the couping, and also provide host clamp connections for the vinyl tubing and the tubing that will run to your faucet / garden hose spigot.
The thermometer is attached with a 3/8" compression tee that fits over the 1/4" copper tubing. In my case, the tee isn't actually very tight on the output end of the chiller, but it doesn't leak. The "gasket" you can see around the thermometer is actually a small piece of silicone tubing shoved into the compression fitting that the shaft of the thermometer goes through.
I don't know how long this page will be up, but check out this image on another site (photografik.net) that shows a similar setup with the fittings and connector pieces.
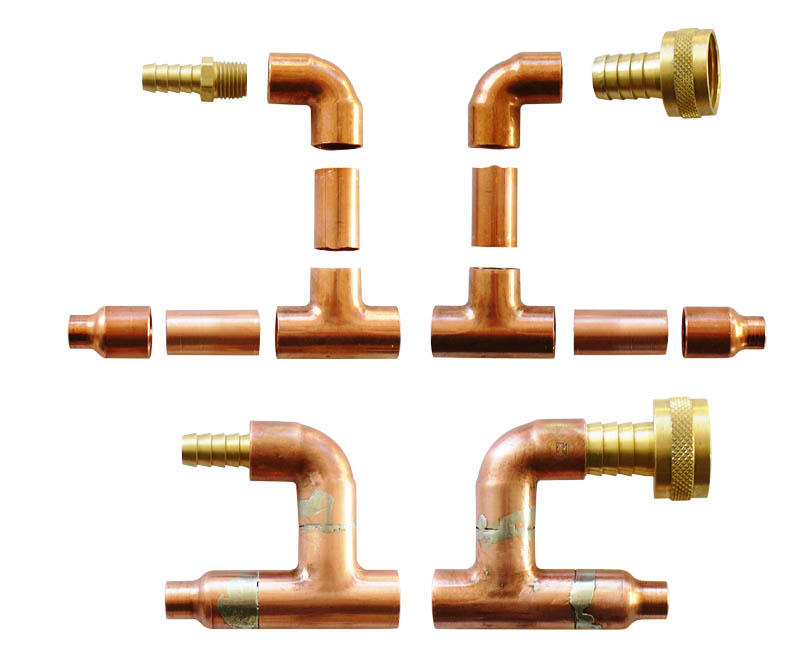
Construction is fairly simple. Straighten out the copper tubing with a spring tubing bender, liberally apply dishwashing soap to the tubing, and work it inside the vinyl tubing. Once inside, clamp one end of the vinyl down onto the copper and start bending the assembly around a suitable cylindrical object. File away the ring on the inside of the reducing couplers until it can slide over the copper tubing (a round chainsaw file works well here). Solder the fittings together, using short sections of straight tubing to connect everything. Once the fitting assemblies are cool, slide them over each end of the inner copper tubing, and fit the vinyl tubing over each end. Carefully (don't melt the vinyl tubing) solder the smaller end of the coupling onto the ends of the copper tubing. Tighten down the copression tee onto the output side of the chiller, connect the water supply and drain lines, and let it rip!
Before and after each brew session I run a gallon of Straight-A in hot water through the chiller (water off). Then I run a gallon or two of sanitizer (StarSan or an iodine based product) through, followed by a gallon of boiling water. Before storing the chiller, I rotate the chiller to get as much water out of it as I can. Some people store their chiller with sanitizer inside, but I prefer cleaning it each time.
Other Equipment pages:
| Mashtun | Brewpot | Aerator | Fermentation Chamber |
Other Brewing pages:
| Equipment | Recipe List | Books | Brewery Research |